
A staple piece of cardio equipment available in David Lloyd gyms, the Wattbike provides a unique indoor cycling experience to develop strength and cardiovascular endurance. While you can simply hop on and begin pedalling, the Wattbike has plenty of features and clever insights that are well worth exploring and understanding to help you get the most from your workout.
We asked Personal Trainers Geoff, from David Lloyd Bolton and Katie, from David Lloyd Hatfield to introduce the Wattbike so you can feel more confident about adding it to your workout.
Setting up the Wattbike:
“Start by placing your saddle and handlebars at the correct height and position. Make sure you make these adjustments before trying to get onto the bike.
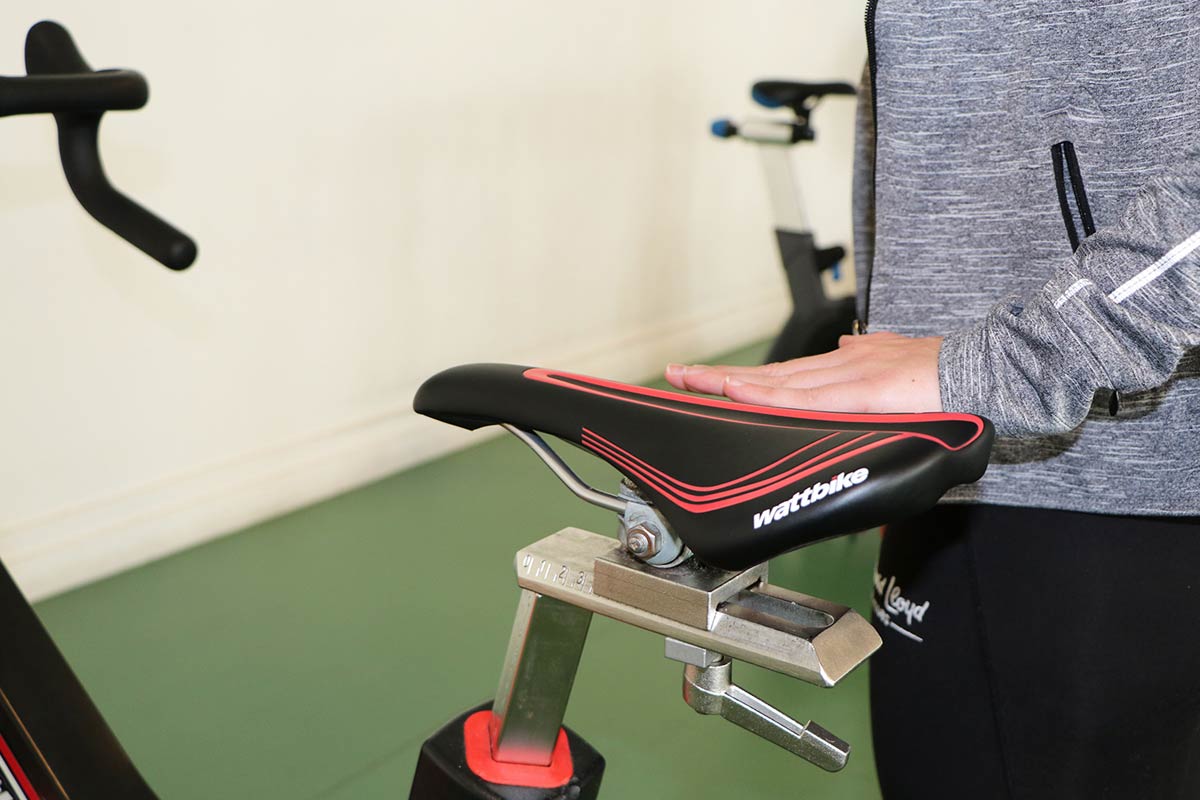
The saddle should be at roughly the same height as your hip as you stand next to the Wattbike, so that when sitting on the saddle and with the pedal at its lowest, the knee should be bent at an angle of 25-30 degrees.”
You can also adjust how far forward the saddle sits. As a rough guide, we recommend having the saddle a forearm’s distance from the handlebars.
“Handlebar height is more dependent on your personal preference, but for general use, it’s recommended you set the saddle and handlebars to the same height. If you prefer your handlebars to sit slightly lower, make sure they are no more than 10cm below your saddle.
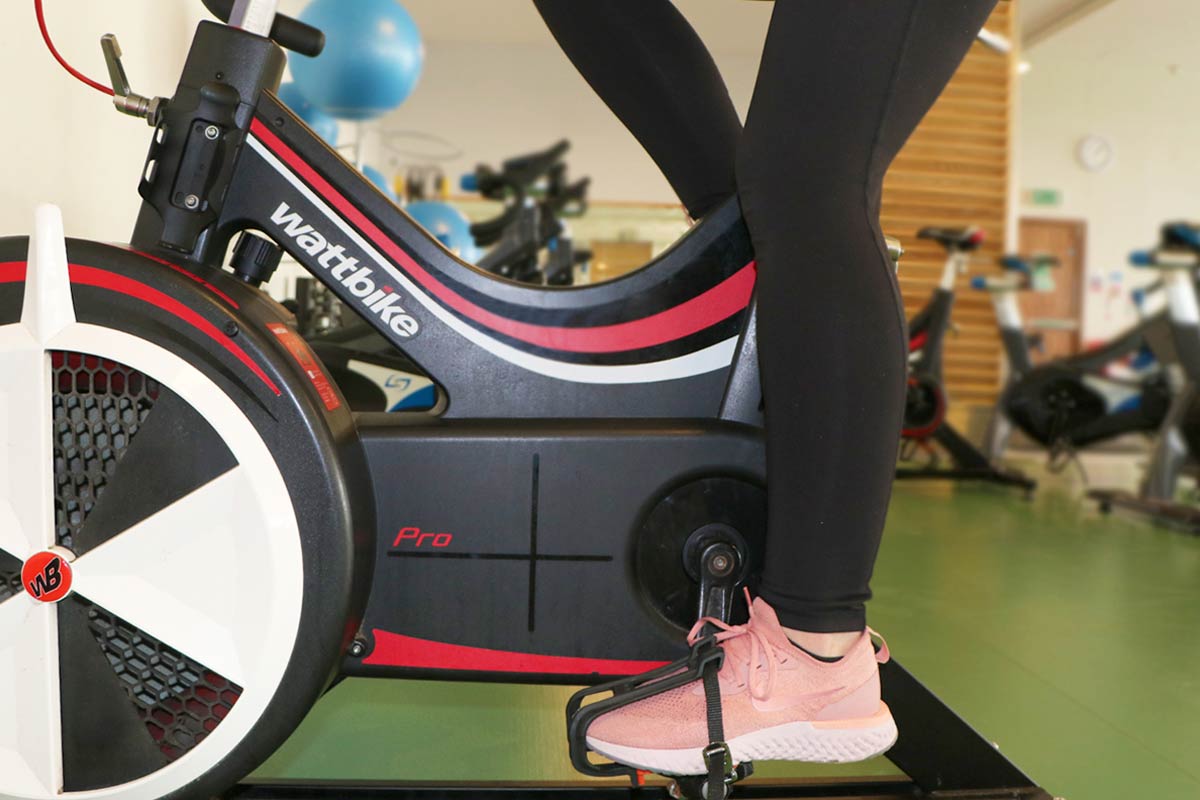
Ensure that you either use the straps provided to secure your feet, or wear cycle shoes that clip directly onto the pedal. Using cycle shoes will generally help you to generate more power and increase the efficiency of your pedalling.”
Resistance:
There are two forms of resistance on a Wattbike.
“On the left hand side there’s an air resistance lever, which allows air in to the fan as you cycle. The lever can be moved through 10 different positions from 1-10, and these levels have a similar effect to gears on a normal bicycle. The higher the number, the more air you allow in, so the greater the resistance and the harder you will have to work.
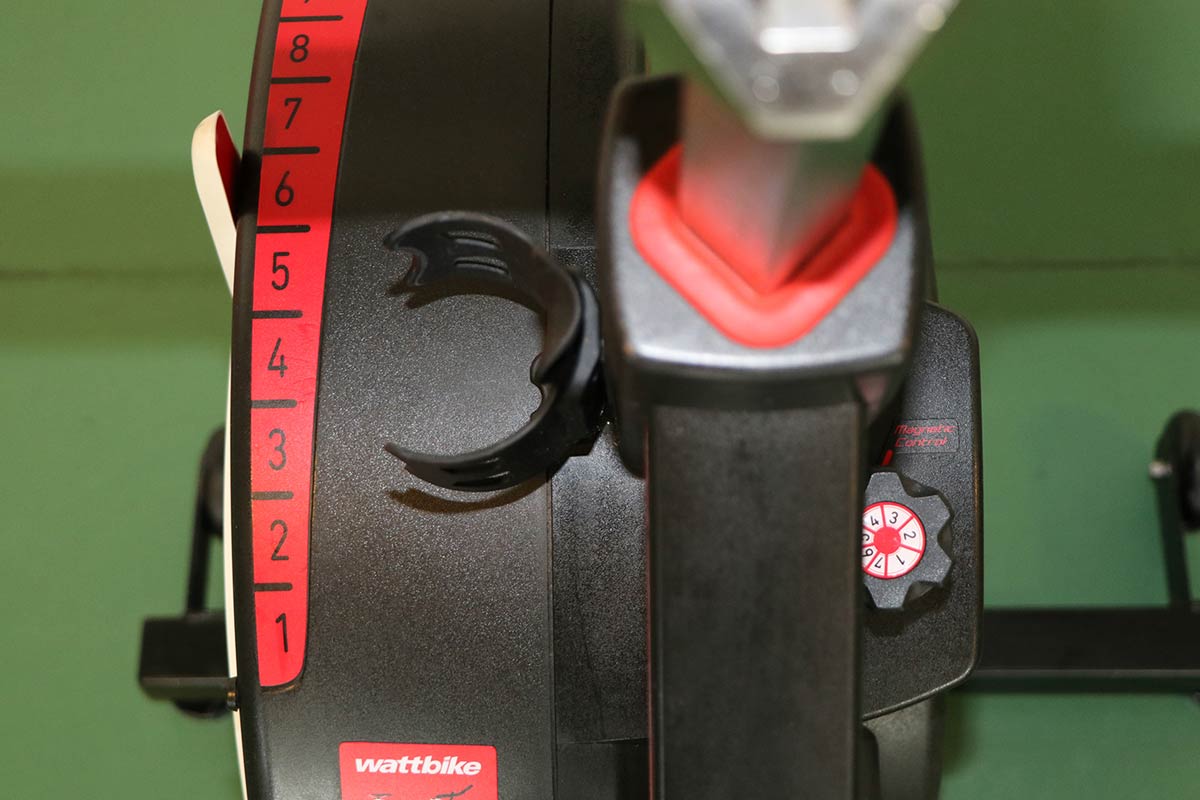
On the right hand side there’s a magnetic resistance adjustment dial which can be used to provide additional resistance to simulate a really tough climb. Again, the higher the number, the ‘steeper’ the climb and more effort will be required to turn the pedals.”
Understanding the screen:
The screen of the Wattbike, also known as the performance monitor, allows you to test, train and review your performance data as you workout.
“You’ll notice that as you start to pedal, the screen is full of information. Don’t be put off by this – it’s all there to help you to exercise more efficiently and to understand your workout. Simply use the up and down arrow buttons to switch between display screens.”
Alongside distance, heart rate, speed and time, which you would expect to see on most exercise bikes, you can also track your overall power and rhythm, as well as your power output per leg via the Wattbike’s unique Polar View data. This displays as a graph to represent your pedalling efficiency.
“Aim for a graph that displays a sausage-like shape, rather than a figure of 8, as this represents better economy of effort.
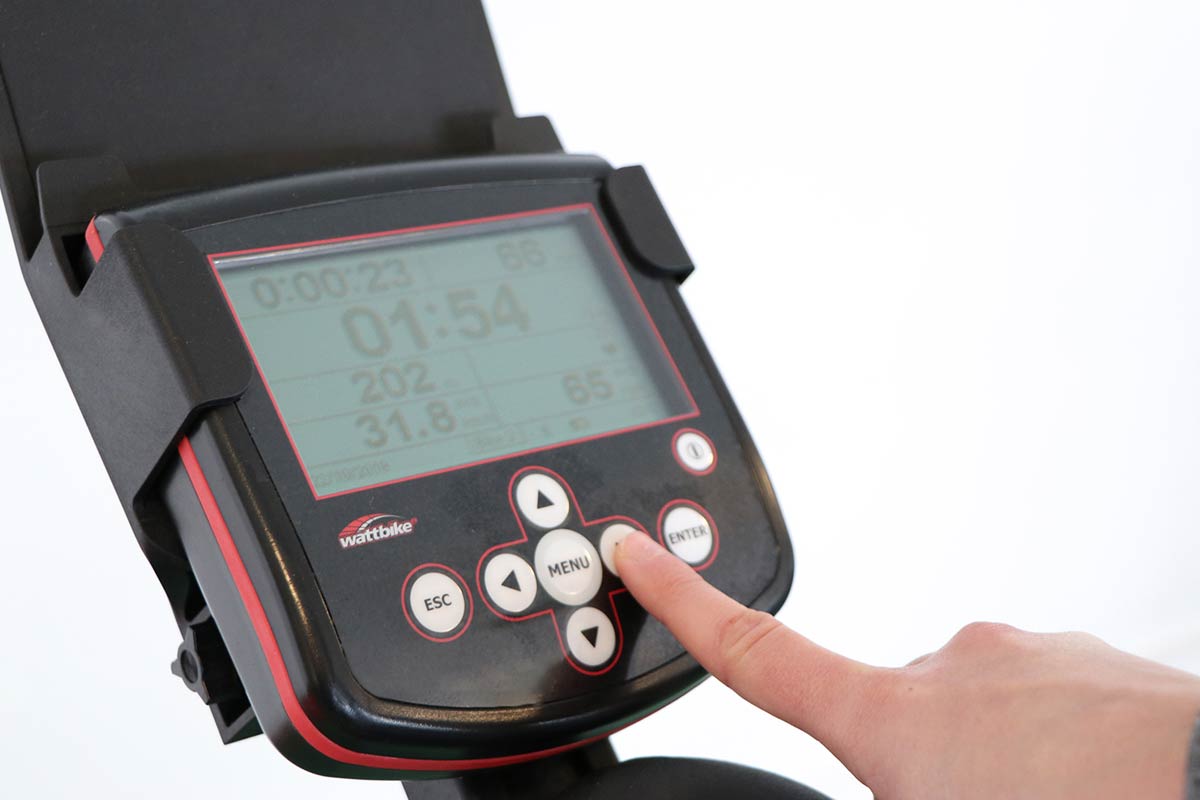
Once you complete your workout, you’ll be able to see an overview of all the key metrics from your workout on the summary screen so you can evaluate your workout.”
The Wattbike is a complex piece of kit that can provide you with a whole wealth of different workouts. If you’re still unsure about using the Wattbike, or want to find out more about how to get the most out of using it, please speak to a member of the fitness team at your local David Lloyd gym and they’ll be happy to help.
Watch our expert Personal Trainers demonstrate how to use other great pieces of equipment:
– How to Use Different Gym Equipment: Strength
– How to Use Different Gym Equipment: Modify & Recover
– How to Use Different Gym Equipment: Cardio
– Using the Rowing Machine? How to Get the Most Out of Your Workout


